Host & Staff Controls and Features
Hosts have elevated controls and features available to them in meeting events, roundtables and webinars. Controls include recording, auto controls, chat moderation and more.
You can assign one, or multiple hosts and make changes in real-time to who's assigned host if changes are needed to access and controls while within the call.
Staff versus Host
Staff have access to all elevated controls and features but cannot be on camera or audio in meeting events and webinar events. They are featured more prominently on the right-hand side, below the hosts & panelists, and above all other event participants.
This is a great solution for support staff who are helping with production and controls but are not presenting or speaking during the event.
Available in Meeting Events & Webinar Events:
You can assign registrants as 'Staff' in the Meeting room or Webinar room tab in the event dashboard.
Panelist versus Host
Panelists have the ability to screen share and come off mute independently, no matter what controls the host has in place in meeting events.
In Webinars, panelists are on screen (camera and audio) with hosts, whereas attendees are not.
They are also featured more prominently on the right-hand side, below the hosts, and above all other event participants.
Available in Meeting Events & Webinar Events:
You can assign registrants as 'Panelist' in the Meeting room or Webinar room tab in the event dashboard.
Assigning Hosts, Panelists & Staff
Assigning in Events
In stand-alone meeting and webinar events, these roles are assigned within the dashboard, within the event, in the Meeting Room or Webinar Room menu option:
- Select + Select Host/Panelist/Staff.
- These roless must be attendees or registrants of the event, so you can search for and select already registered attendees in this pop-up, or at the base of the page select + New Attendee As Host/Panelist/Staff to register and add someone from your community as the host.
- Note: Limited approval users cannot join meeting rooms or webinars and cannot be assigned Host, Panelist or Staff.
- Select ‘Submit’ and ensure you save your work after you’ve added all hosts to the meeting.
If you want to add more hosts, panelists or staff, or change them at a later date, you can access this feature within the event, in the Meeting Room or Webinar Room tab on the left-hand side menu, within the event.
You can make changes while on the call if changes or additional hosts are needed; all features will automatically enable and those new hosts will have access to the controls.
Note: While on the call, hosts’ profile cards will populate at the top of the list and be visible at all times, no matter if they are on the call or not.
Assigning a host to a roundtable (community level or in-event)
Hosts are assigned within the roundtable when adding a time slot:
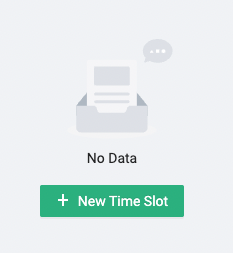
Select the roundtable, and + New Time Slot and add all the necessary information for the time slot when that roundtable is open.
- Scroll to the base of this pop-up and search for, select, and add user(s) as host(s) (hosts must already be a member of the community) - when you have finished adding all hosts, select 'Submit'.
- Select 'Confirm' to finish adding host(s) to the roundtable.
If you want to add more or change hosts at a later date, you can access this feature within the roundtable and time slot. You can make changes while on the call if changes are needed; the user will need to refresh the browser to enable the changes and have access to the controls.
Note: Hosts’ profile pictures will always populate within the roundtable, whether they are on the call or not.

Host & Staff Controls
The controls below are available for assigned hosts and staff members in Meeting and Webinar events.
- To see host controls that are specific to Meeting events, navigate to the Meeting Events section.
- To see host controls that are specific to Webinar events, navigate to the Webinar Events section.
Host controls are available to hosts signed in on a computer laptop or desktop, and are not mobile-friendly, yet.
Record the event
Meetings and Webinars can be recorded - the entire event or segments of the call.
💡 Pro Tip: Assign one host to conduct the recording so there isn’t confusion or overlap in recordings.
Here is a resource all about recording meetings, and how to manipulate the view in the recording.
How to record a meeting or webinar:
- Select the Record button from the settings menu at the base of the screen.
- A pop-up will appear to confirm you want to start recording, select 'Yes, start recording'.
Note: There is about a 10-second delay between when you select the record button, and when it starts actually recording. The recording icon in the upper left will be grey during that time.
- Once recording, the recording icon in the upper left will turn to red and remain red until you end recording.
- End the recording by selecting the Record button from the settings menu at the base of the screen and select ‘Yes, end recording’ to confirm the stop.

All recordings are saved as mp4 files and are accessible from the admin dashboard, within the event, in the Recordings tab. If there are multiple recordings for one event, they will list in chronological order and show the duration of the recording in the Time column.
💡 Pro Tip: Publish post-event replays of your events to encourage engagement on topics and conversations even after the event has concluded.
Screen share
Hosts (and Panelists) can share their screens during a meeting or webinar event.
Simply select the 'Share screen' icon from the bottom menu, and select which screen or window to share.

Only one user can screen share at a time, and the host or panelist who is screen sharing will see what they're sharing in the view within Gradual. They can stop sharing by selecting the red 'Stop Sharing' button.

The browser being used dictates what's available to share in the event.
We highly recommend using Google Chrome as your browser for screen sharing as it allows the user to select the tab, window, or entire screen to share.
Safari must be updated to the most recent version (16.0 or higher) and limits the user to select an entire window or entire screen to share.
Note: If a meeting room or roundtable is being hosted within a livestream or hybrid agenda, ALL attendees can screen share.
Control attendees’ audio
Hosts and staff can control the audio of all event attendees when they enter the call and while they’re on the call.
All controls are accessible from the Mic Control button in the upper right-hand side of the screen.
Mute all
This allows you to mute all current and new attendees (hosts and panelists included), and enable attendees to unmute themselves or not. If you disable attendees from unmuting themselves, they must raise their hands to be unmuted.
Note: In Webinars, only Panelists and Hosts can come off mute.


This is what will show to event participants when you mute all attendees:

This is what will show to event participants if they try to unmute themselves:

Ask all to unmute
This will prompt a pop up for all attendees that allows them to unmute themselves, or remain muted.
This is what will show to event participants when you ask all attendees to unmute:

Note: In Webinars, only Panelists and Hosts can come off mute.
Mute attendees upon entry
This will automatically mute all attendees upon entry to the call, and they cannot unmute themselves. If they’d like to come off mute, they can raise their hand to speak.
Note: The system will automatically enable 'Mute attendees upon entry' for any meeting or webinar event where more than 25 seats are assigned in the dashboard.
This is what will show to event participants when enabling their camera and microphone upon entry to the call (the microphone is red and locked):

Note: In Webinars, only Panelists and Hosts can come off mute.
Control attendees’ view
In meeting rooms or webinars, hosts and staff can spotlight or pin speakers or certain attendees so they are featured in the attendees’ view, and in the recording.
The default view when people join the meeting is "Gallery view" - where all attendees, speakers, and panelists are shown on the screen in a grid.
Note: The default, gallery view will also be what is shown in the recording, unless you spotlight speakers or attendees.
Learn more about how to spotlight or pin speakers in this guide: Spotlight and Pinning Speakers in Meeting Rooms
Configure breakout rooms & join any breakout rooms
In meeting rooms and webinars, hosts and staff can configure breakout rooms with the active attendees on the call.
Learn more about configuring breakout rooms in this guide: Creating Breakout Rooms

Note: Breakout rooms are not available in roundtables.
Moderate Chat and Q&A
Chat
Learn more about how to moderate chat and event attendees here.
Q&A
Hosts and staff are the only users who can moderate the meeting event chat and they do so on the front end, live, during the event:
- Approve questions on the front end during the event, and only those approved questions will appear in the Q&A tab during the event
- Pin a question that is being answered or addressed to the top of the Q&A tab during the event (and unpin, if necessary)
- Mark question(s) as answered (and marked unanswered, if necessary)
- Delete questions (meeting room questions cannot be recovered if deleted by host)
- Clear Q&A board which deletes all questions (meeting room questions cannot be recovered if deleted by host)
Meeting Events
In meeting events, hosts and staff can enable a waiting room or lobby.
Waiting room
Hosts and staff can now enable a Lobby (Waiting Room) for meeting events, where all attendees will wait in a lobby before being let into the call. If enabled, all attendees and panelists will need approval from the host(s) before joining the call.
Learn more about how to enable and manage the lobby, and the user experience here.
Webinar Events
In webinars, hosts and staff can 'Go Live' and start the webinar and end the webinar for attendees. They also have full control of who is on screen and can promote attendees to 'panelist' to bring them live on-screen during the event.
Learn more about webinar controls and settings here.